Manually adding data to WordPress can be extremely time-consuming. Tasks like copying product listings, uploading images, and filling in metadata can take hours and become a tedious process—one that could easily turn into a reason for stopping such work altogether.
Fortunately, the WP Smart Import plugin simplifies this process by allowing you to import data from XML files directly. It’s straightforward: simply load a file, map fields within WordPress, and start the import.
Setting Up WP Smart Import
- Install and Activate the Plugin Download and install the WP Smart Import plugin, then activate it in your WordPress admin panel under Plugins.
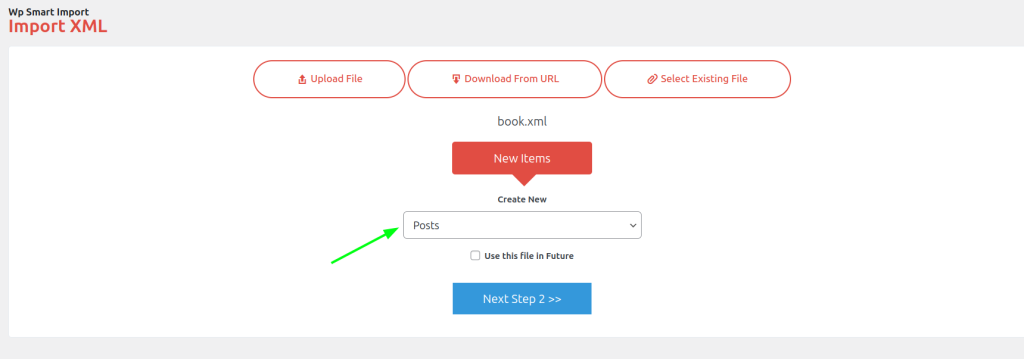
- Upload Your File You can upload your XML file with your listings by selecting “New Items > Create New > Posts” if you’re doing this for the first time.
- Import Options for XML Files WP Smart Import offers three ways to import your data:
- Upload directly from your computer.
- Use a URL link to download the file.
- Choose an existing file from your server.
Mapping Data Fields
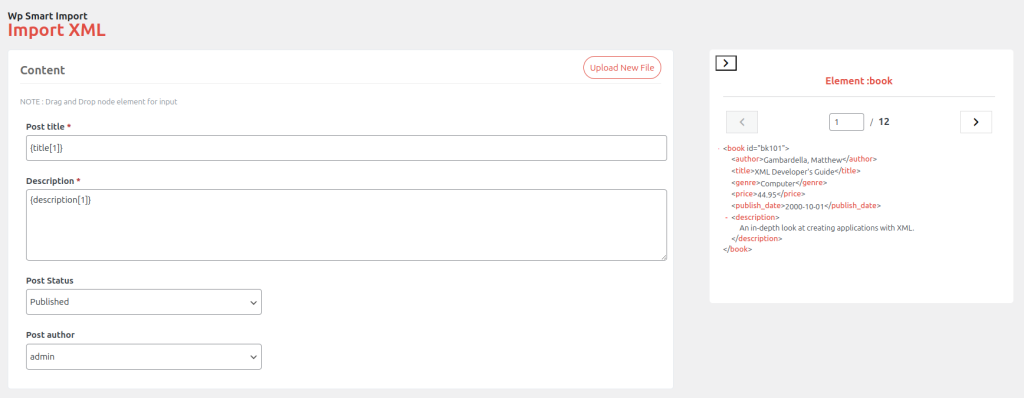
After uploading your XML file, simply drag and drop each field from your file into the corresponding fields in WordPress. This ensures that data aligns with WordPress posts and pages as desired.
Images Import
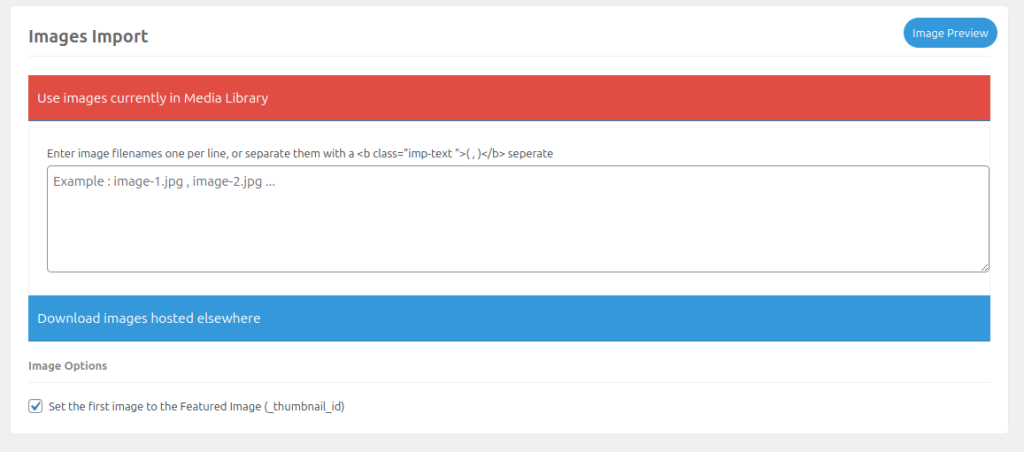
The WP Smart Import plugin in WordPress simplifies image management for posts and pages. It provides two main options: using images from the Media Library or downloading them from external sources. The “Use images currently in Media Library” option allows you to select existing images, saving time and avoiding duplicate uploads. The “Download images hosted elsewhere” option lets you add images directly from external URLs, which the plugin downloads and stores in your Media Library. selecting the “Set Featured Image” checkbox automatically assigns the first image as the post’s main thumbnail. This setup enhances flexibility and efficiency when adding visuals to WordPress content.
Managing Categories, Tags, and Custom Taxonomies
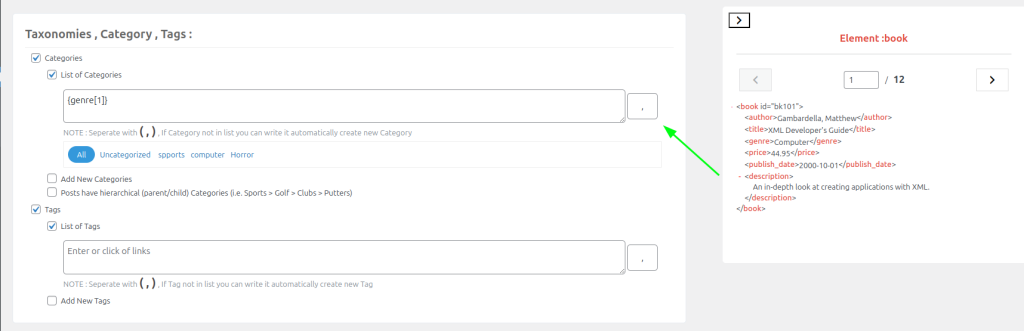
WP Smart Import also supports importing content into categories, tags, and custom taxonomies associated with your post types. For example, locate the element within your XML file to categorize a blog post and drag it into the WordPress categories box. This approach maps the genre in your file directly to WordPress post categories.
Adding Custom Fields
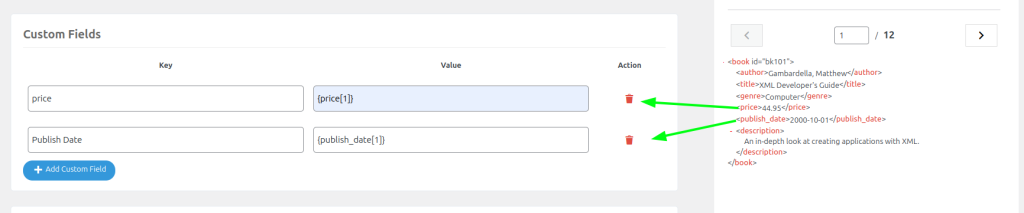
The WP Smart Import plugin integrates well with custom fields created by the Advanced Custom Fields (ACF) plugin. For instance, if you have “Price” and “Publish Date” as custom fields, you’ll need to create corresponding fields in WordPress. Once created, simply map them from the XML file to the new fields in your site, making sure that field names match exactly.
Defining Unique Identifiers
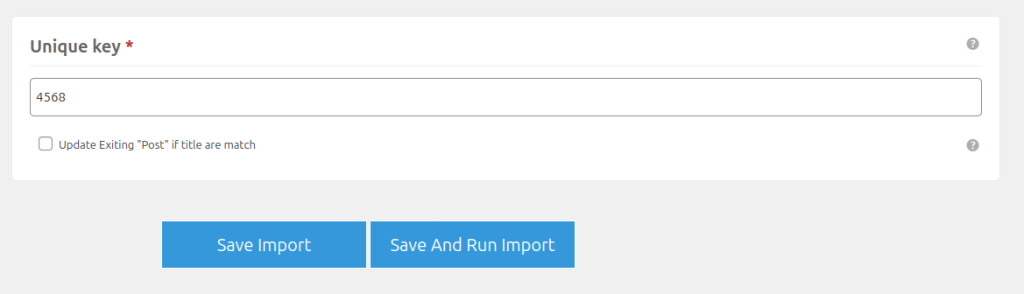
Each new post created from your XML file will require a unique identifier. For example, if you’re importing books, you might use a unique book identifier as the key to differentiate each entry.
Once you’ve set this up, click Save and Run Import to begin.
Final Steps
After setting up each field, including custom ones, click on Save and Run Import. The data should then be visible within WordPress, organized and mapped according to your selections.
Summary
This guide walks you through the essential features of the WP Smart Import plugin. With its user-friendly design, it simplifies the process of importing large datasets into WordPress—whether posts, pages, or any custom post type—helping you save hours on data entry and focusing instead on what matters most.