The WordPress Block Editor, also known as Gutenberg, is a modern content editor that simplifies creating and designing posts or pages by using blocks. Whether you are new to WordPress or transitioning from the Classic Editor, this guide will help you understand and use Gutenberg effectively.
What Is the WordPress Block Editor?
The Gutenberg editor replaces the old Classic Editor with a block-based system. Each content such as text, images, videos, or buttons is added as a separate block. This allows for greater flexibility and customization when designing posts and pages.
How to Access the WordPress Block Editor
- Log in to WordPress: Go to your WordPress dashboard.
- Create a New Post or Page: Click on Posts → Add New or Pages → Add New to launch the editor.
- Start Editing: You will now see the block editor, where you can begin adding content.
Understanding Blocks in Gutenberg
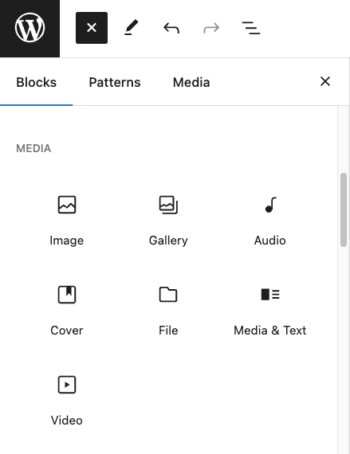
Each section of content in the WordPress Block Editor is a “block.” Here are some common block types:
- Paragraph Block: This is the default block used for writing text. Click and start typing.
- Heading Block: Use this block to add headings (H1, H2, H3, etc.) to structure your content.
- Image Block: Allows you to upload or select images from the media library. You can also add captions and adjust alignment.
- List Block: Creates bullet points or numbered lists to organize information.
- Button Block: Adds clickable buttons to your page, useful for calls to action.
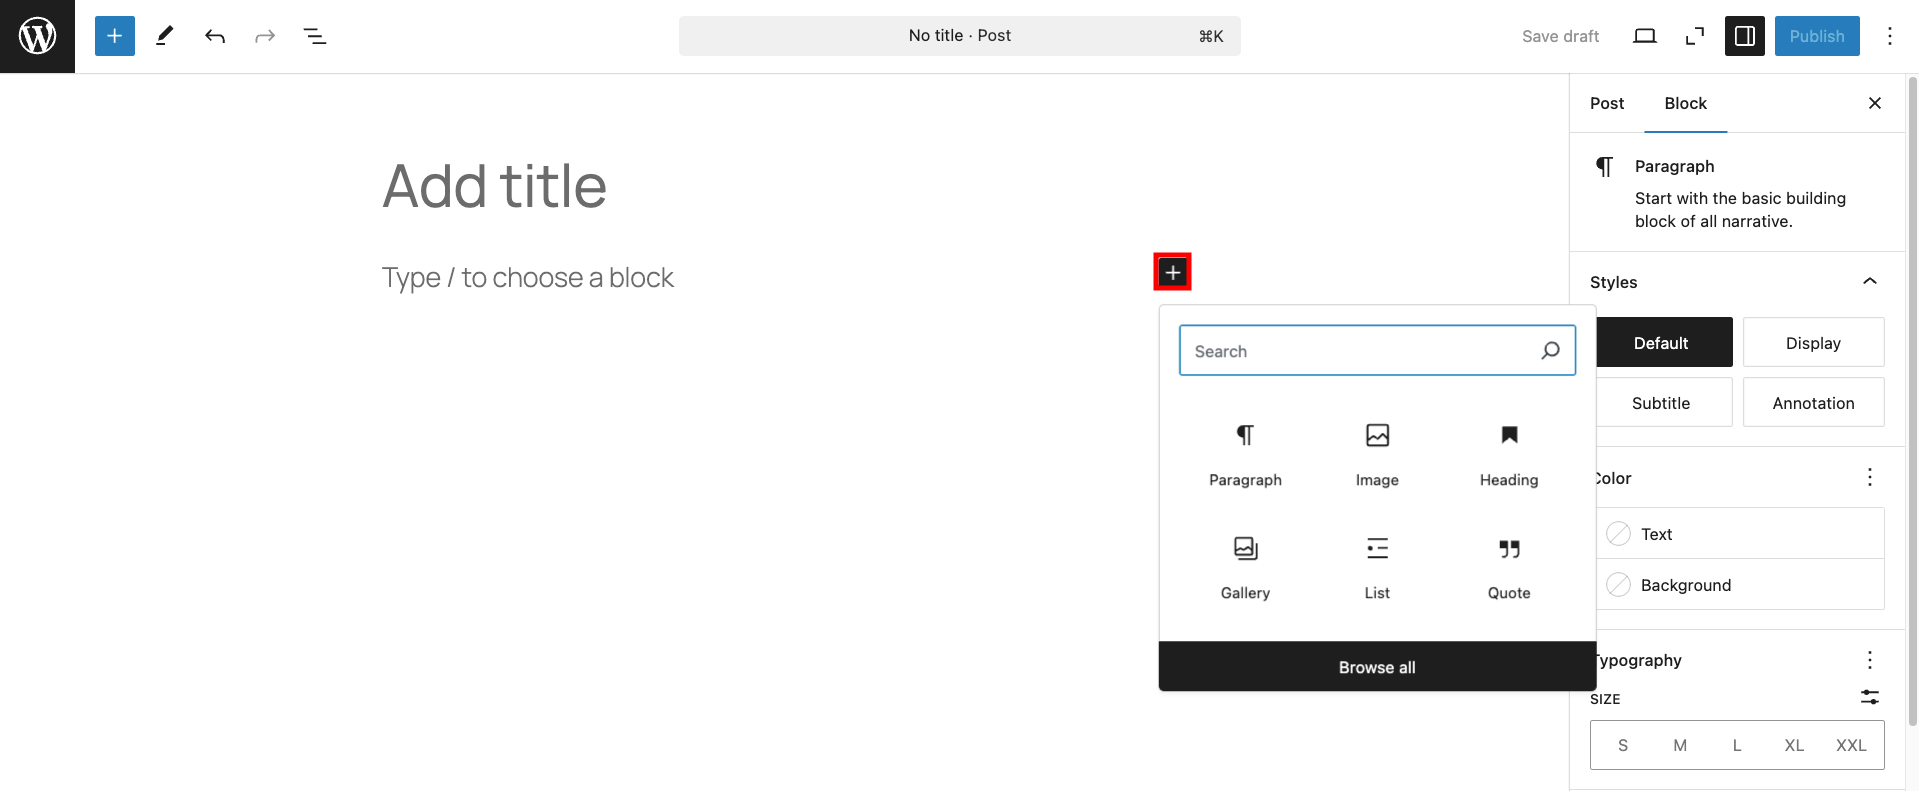
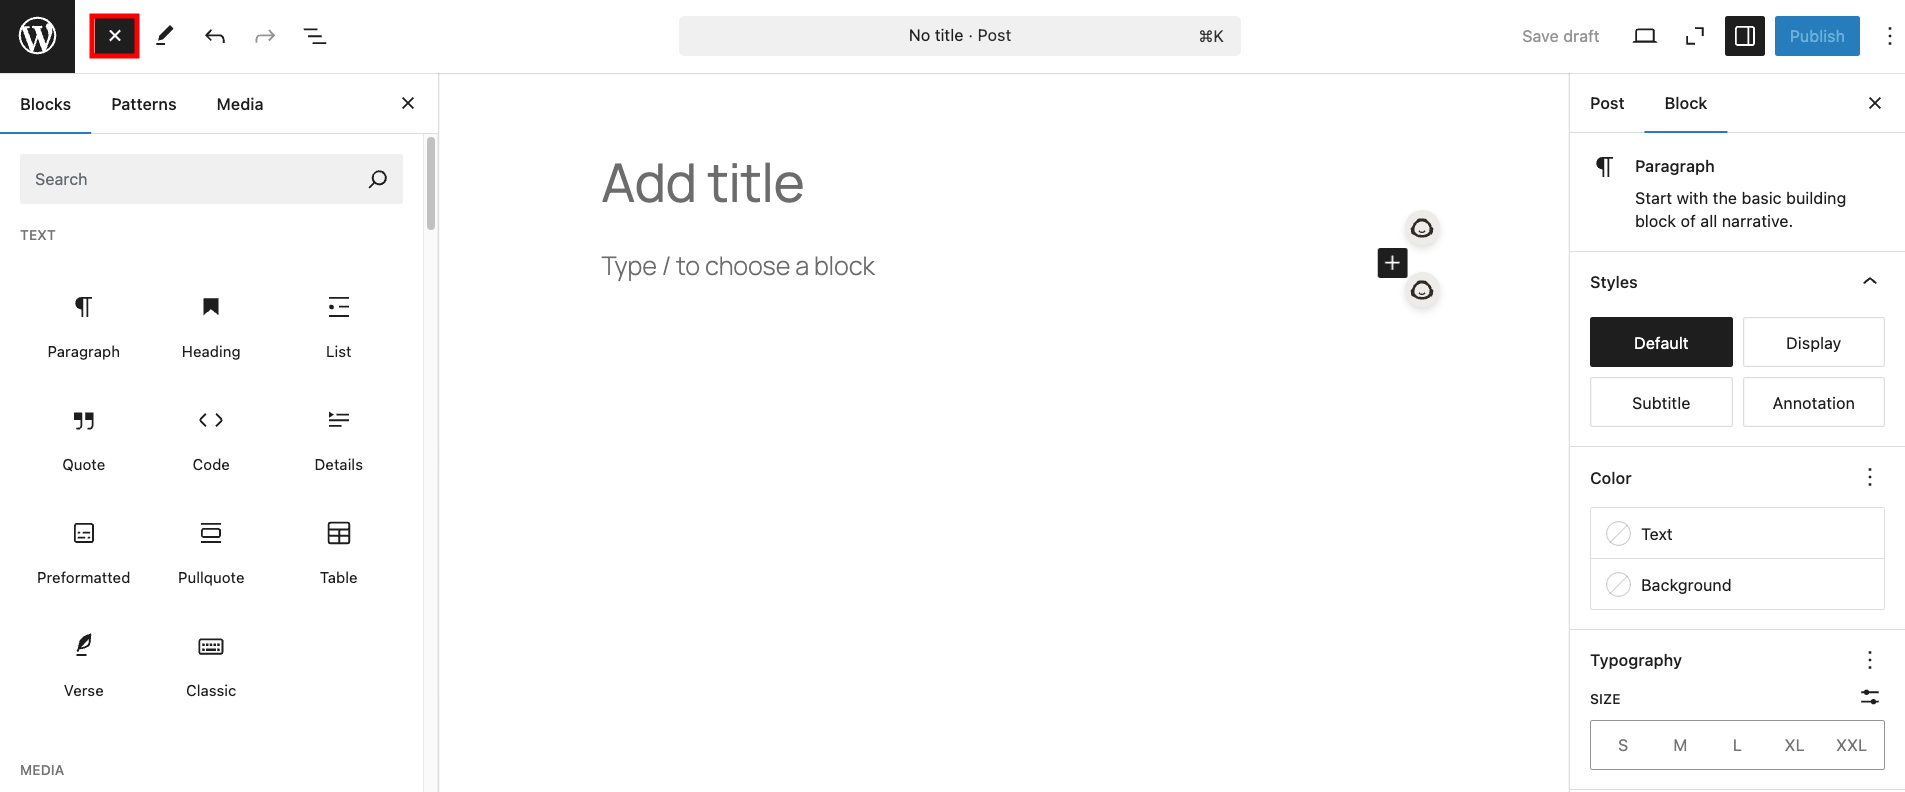
How to Add a New Block
- Click the “+” (Add Block) button in the editor.
- Search or scroll to find the block type you need.
- Click the block to insert it into your post.
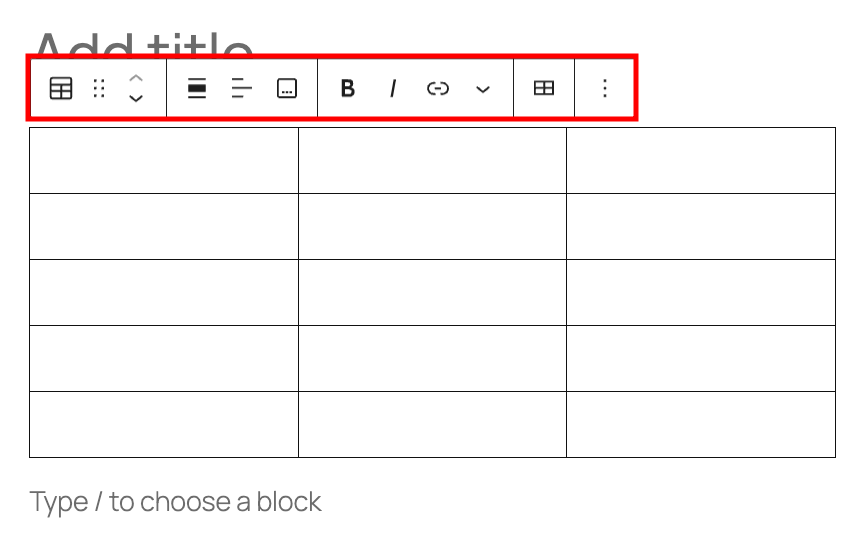
Customizing Blocks
Each block has settings that allow you to customize its appearance and behavior.
- Click on the block to reveal the toolbar above it.
- Use the sidebar settings for more options (e.g., font size for text, and alignment for images).
- Drag and drop blocks to rearrange content.
Adding Media (Images, Videos, and Embeds)
- Images: Use the Image Block to upload or select media from the WordPress library.
- Videos: Use the Video Block to upload videos or embed them from platforms like YouTube.
- Embeds: Use the Embed Block to add content from Twitter, Instagram, or other websites.
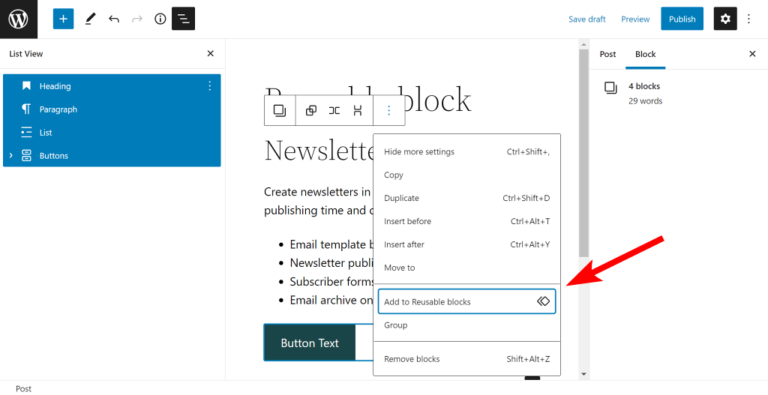
Using Reusable Blocks
If you frequently use the same content (e.g., call-to-action buttons, disclaimers), you can save time by creating a Reusable Block:
- Select a block and click the three-dot menu (⋮).
- Click Add to Reusable Blocks and name it.
- Use this block in future posts without recreating it.
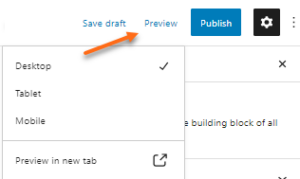
Publishing Your Post
Once your post is ready:
- Click Preview to see how it looks.
- Click Publish and confirm to make it live.
Conclusion
The WordPress Block Editor (Gutenberg) makes it easy to create professional-looking content with its block-based approach. With practice, you’ll be able to customize posts and pages effortlessly.