Starting an online store can be a great way to grow your business, and WooCommerce makes it simple. Whether you’re selling products, services, or digital downloads, WooCommerce is one of the best tools available. It’s a free WordPress plugin that allows you to turn your website into a fully functional eCommerce store.
What is WooCommerce?
WooCommerce is a popular eCommerce plugin for WordPress. It allows you to sell products and services directly from your website. It is free to use and comes with many features, such as:
✅ Product listings
✅ Shopping cart & checkout
✅ Secure payments
✅ Order and inventory management
With WooCommerce, you can customize your store to your specifications, making it easy to create a unique online shop.
In this guide, we’ll walk you through the step-by-step process of setting up your WooCommerce store.
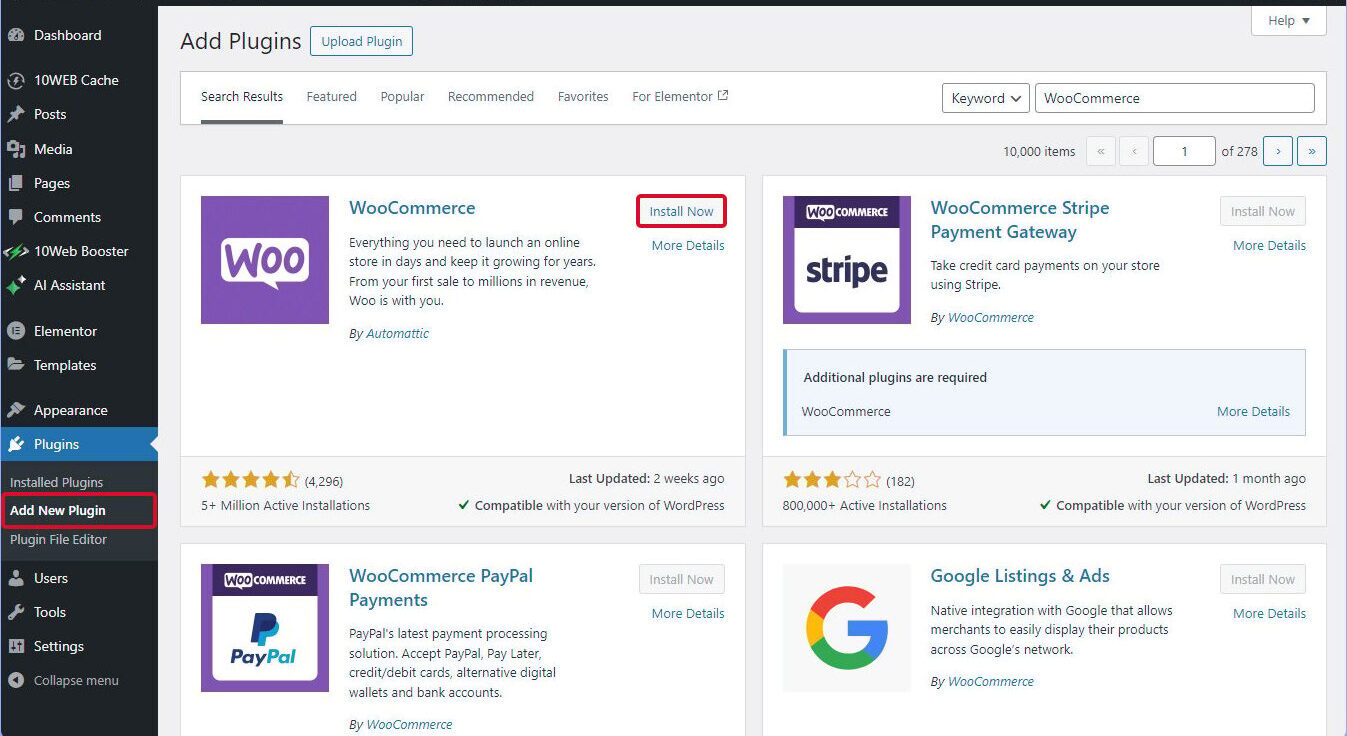
Step 1: Install the WooCommerce Plugin
- Log into your WordPress dashboard.
- Go to Plugins > Add New.
- Search for “WooCommerce.”
- Click Install Now, then Activate.
Step 2: Configure Your Store Details
WooCommerce will ask for your store location, currency, and product types. Fill in these details carefully.
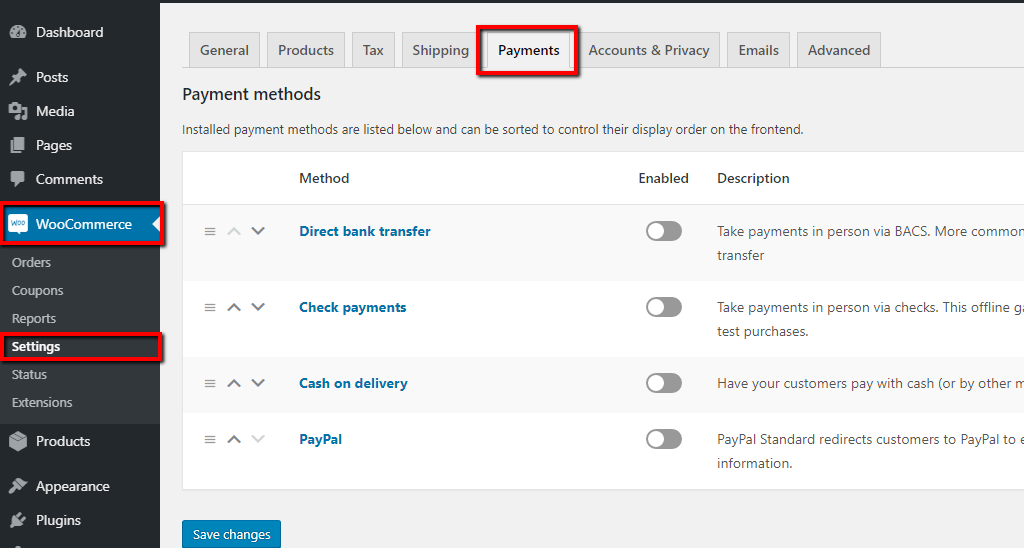
Step 3: Choose Payment Methods
WooCommerce supports multiple payment gateways, such as:
💳 PayPal
💳 Credit/Debit Cards
💳 Bank Transfers
Pick the payment options that suit your business and follow the instructions to set them up.
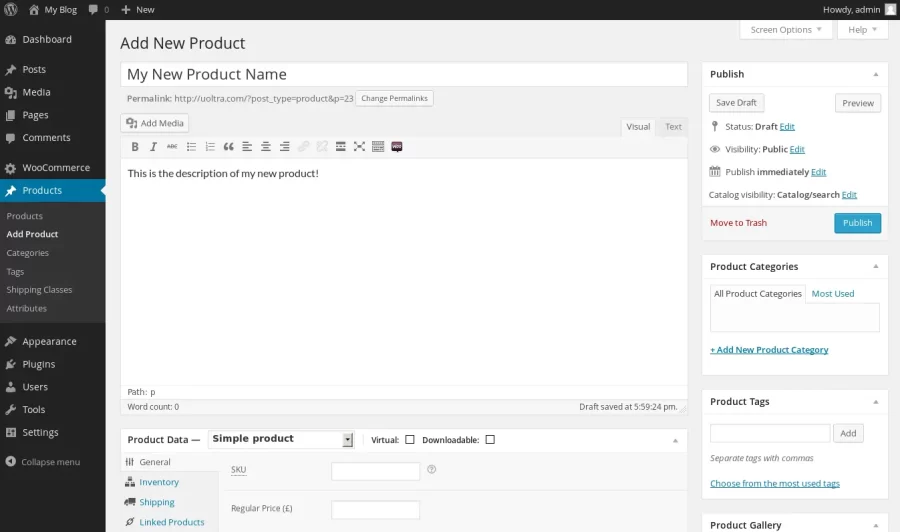
Step 4: Create a Product Listing
- Go to Products > Add New in your WordPress dashboard.
- Enter the product name, description, and price.
- Upload high-quality images of your product.
- Set up categories and tags to organize your products.
- Click Publish to make your product live!
Step 5: Choose a WooCommerce-Compatible Theme
A good theme makes your store look professional. Some popular WooCommerce themes are:
🎨 Storefront (Free)
🎨 Astra
🎨 OceanWP
You can install a theme by going to Appearance > Themes in WordPress.
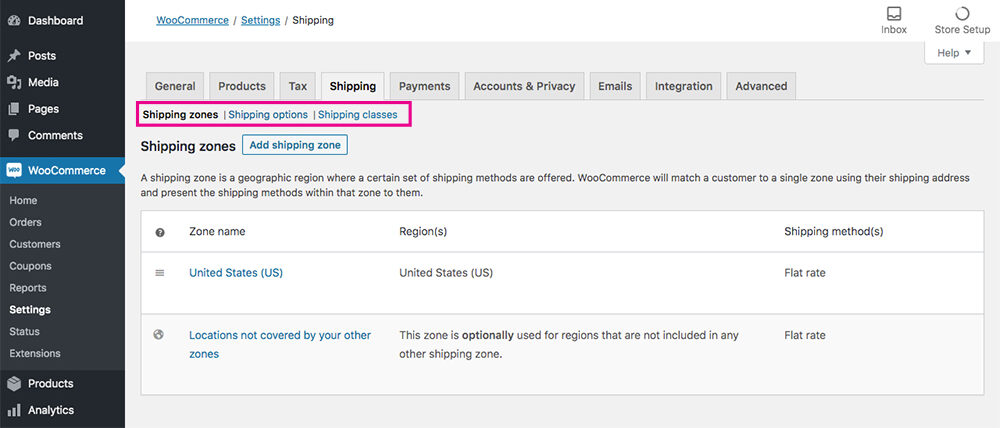
Step 6: Configure Shipping Settings
- Go to WooCommerce > Settings > Shipping.
- Set up shipping zones (e.g., Local, National, International).
- Choose shipping methods like flat rate, free shipping, or local pickup.
Step 7: Launching Your Store
Before launching your store, test everything to ensure it works smoothly.
✅ Place a test order
✅ Check payment processing
✅ Verify email notifications
✅ Optimize your store for speed and mobile use
Once everything looks good, start promoting your store on social media, SEO, and paid ads!
Conclusion
Setting up an online store with WooCommerce is simple and cost-effective. You can create a professional online store and start selling your products with just a few steps. Follow this guide, and soon, you’ll have a fully operational eCommerce business!